Actions reference
There are four types of actions that can be executed with triggers. Set field and Send email actions are also available for Scheduler tasks or SLA policies.
Assign ticket
The action assigns tickets to agents with the Active status toggle turned on. You can find the status toggle in an agent’s account in the HelpDesk Contacts list.
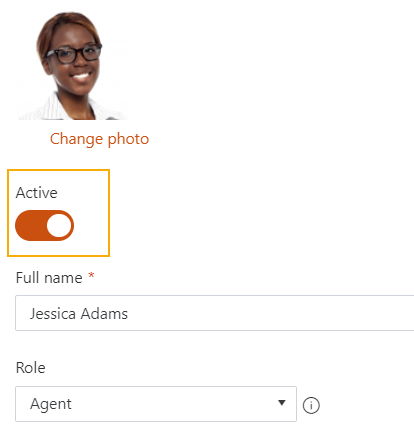
It also handles tickets for ‘Disabled’ agents when an agent leaves the company or goes on vacation. The system automatically reassigns the tickets to another available agent.
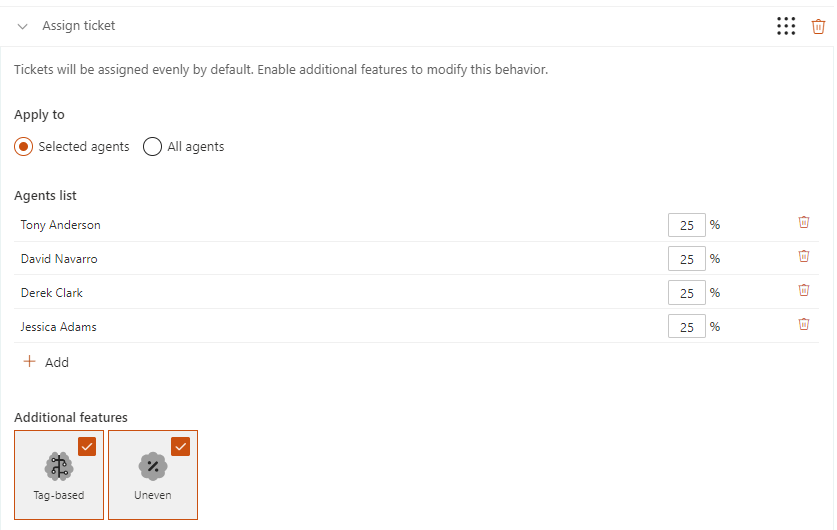
The action consists of these elements:
Apply to. Defines whether the ticket distribution will work for selected agents or for all agents.

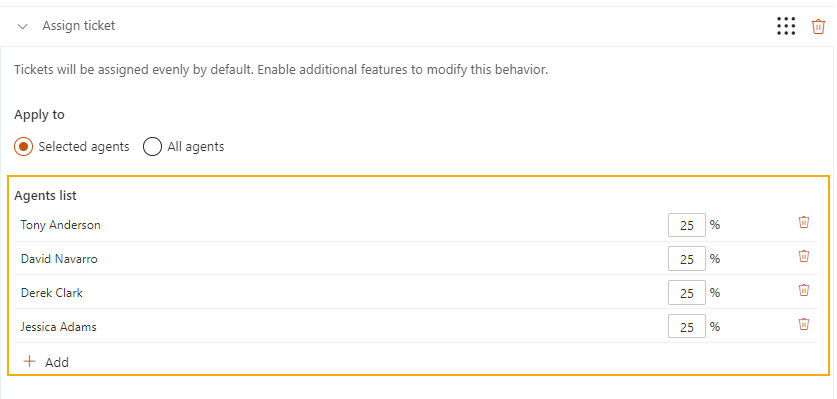
Agents list. Defines the ticket distribution among the selected agents. Click the Add button to select agents from the dropdown list.
Assignment features.
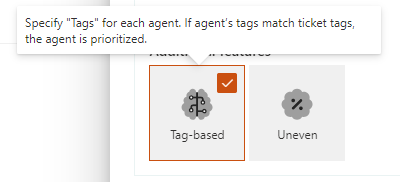
Tag-based. It allows assigning tickets based on agents’ tags. Each agent has a Tag field with a set of tags matching their specialty.
Uneven. This feature enables the ability to specify load percentage. In this case, each agent has a weight in percentage, specifying how many tickets this agent should receive compared to others.
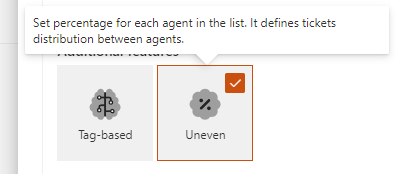
Based on the activated features, there are three possible scenarios. Take a look:
Set field

The action sets values in the “Tickets” list. It has the following properties:
Field nameis a drop-down menu with the names of fields that can be changed.Field valuedepends on the selectedField name. Let’s check the available options.
It sets a text value for text fields (you can enter the value without quotes or use context tokens).
The tokens are enclosed within double braces and provide dynamic data from the current ticket.
For example, the token {{Ticket.Tags.Title}} will be replaced with the value of the “Tags” column so the custom column will be filled with it:

Find more information about using the tokens in the guide.
If the
Field nameis a date. For example, Due date. Then you can either specify the number of days from now:

Or select a specific date:
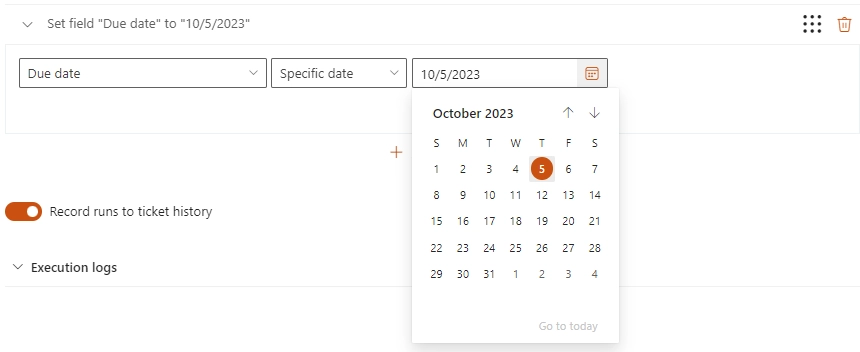
If the
Field nameis AssignedTo, theField valueis a lookup field for selecting a SharePoint member.

4) If the Field name is Tags, the Field value is a multi-choice lookup field for selecting tags from the Tags list.
There is also an optional drop-down menu with Replace, Add and Remove actions.

Replace action removes the existing tags from the tickets and adds new ones.
Add action adds tags to the tickets.
Remove action removes the selected tags from the tickets.
Send email
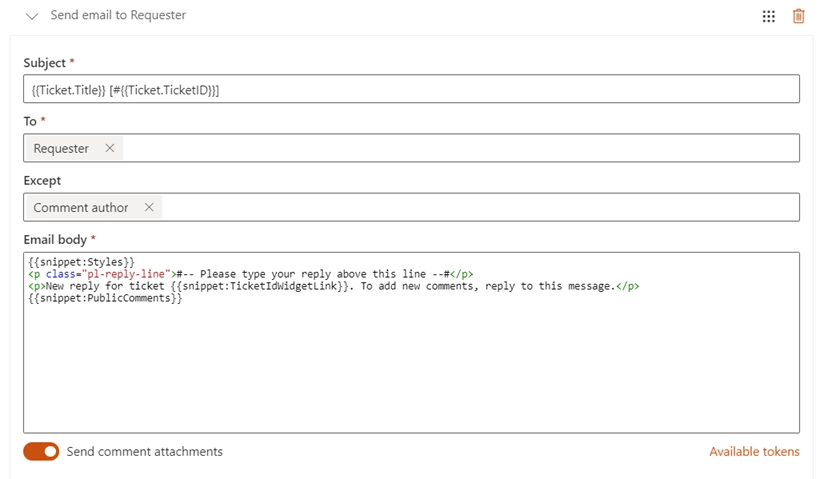
This action sends an email to multiple recipients. You can use tokens in any field of the action. Used in the “Email body” and combined with snippets, they constitute a message template with the required information. The action has the following properties:
To(a required field defining recipients of the message, you can pick a contact from the “Contacts” list or recipient token)Except(an optional field excluding recipients, you can pick a contact from the “Contacts” list or recipient token)Subject(in this field, you can use context tokens)Email body(configure your message template here using context tokens and snippets)Attachment URLs(a semicolon-separated list of attachments’ URLs, it’s best to put the following token here:{{Comment.AttachmentUrls}})
Instead of specifying certain contacts, you can use either usual tokens or predefined ones as recipients:
All agents(all contacts from the “Contacts” list with theAgentrole)Requester(a contact from the “Requester” field of the ticket)Cc(contacts from the “Cc” field of the ticket)Assignee(a user from the “Assigned to” field of the ticket)Comment author(available only for theComment has been createdevent)
On the screenshot above, there is a sample of a notification template for a requester. The fields To and Except contain the predefined tokens which can be selected from a drop-down menu. Thus, the action will send a message to the requester if this person is not the author of a newly created comment.

The Subject field is populated with context tokens that will be replaced by title and ID of a ticket. For more information on the tokens usage, read the `accordant section`_.

The Email body contains snippets and a text marked up with HTML. The snippets are enclosed between the double braces as well as tokens. They are used for inserting predefined blocks of information into the message body. Check the article Building advanced email templates to know more about this action.

Change comment type to private
The action doesn’t require any input and can be performed only on the Comment has been created event.
It allows adding private notes via email.
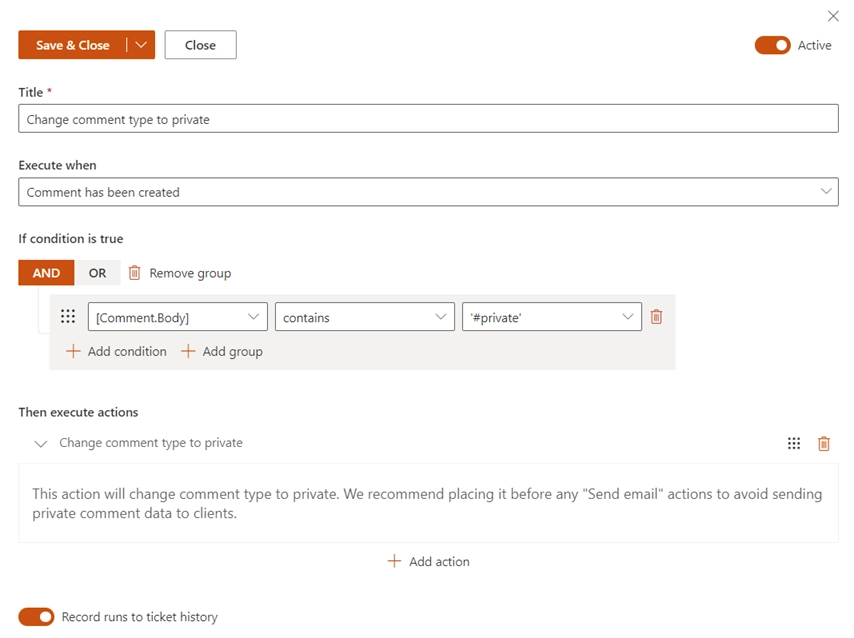
For example, the agent replies to the ticket and adds a hashtag #private to the message.
A trigger will check whether the message body contains this string.
If the condition is true, HelpDesk changes the type of comment to private.
Here is a configuration of such a trigger:
Note
The trigger with this action should be at the top of the list. It will exclude the possibility that another one will notify the requester about such a message.
How to use tokens to access ticket and comment field values
You can use a сontext token in the trigger actions such as Send email or Set field. When the one is executed, the token will be replaced by the ticket or comment property to which it refers.
Define the source of data
One of the options is retrieving properties of either a ticket or a comment. You can get the properties of a current or previous version of the ticket. One of the following keywords should be used to get a required property:
{{Ticket}}(can be used on any event){{LastTicketVersion}}(can be used on theTicket has been changedevent){{Comment}}(can be used on theComment has been addedevent)
Get simple values
To get a column value for a ticket or comment, it is necessary to use the column’s internal name:
{{Ticket.TicketID}}
{{Ticket.Title}}
{{Comment.Body}}
{{Comment.Type}}
In the example above, TicketID and Title are internal names of the columns in the “Tickets” list.
Body and Type are the ones in the “Comments” list.
This way You can retrieve any simple value such as text, choice or date and time.
In the case of multiple values, they will be separated by semicolons.
Get lookup values
Sometimes you may need to access data from a lookup column. The token will look like this:
{{Ticket.Requester.Title}}
{{Ticket.Requester.Organization.Title}}
In the example above, the tokens return a full name of the requester and a name of the requester’s organization via lookup columns. The “Requester” is a lookup column in the “Tickets” list that refers to the “Title” column in the “Contacts” list. The “Organization” is another lookup column in the “Contacts” list that refers to the “Title” column in the “Organizations” list.
Get person or group values
Getting data from the field which has a Person or Group type is almost the same as in the case with lookup fields. The only exception, that there is a fixed list of properties that you can refer to:
IDLoginNameTitleEmail
For example, tokens for a person or group specified in the “Assigned to” field will look as follows:
{{Ticket.AssignedTo.ID}}
{{Ticket.AssignedTo.LoginName}}
{{Ticket.AssignedTo.Title}}
{{Ticket.AssignedTo.Email}}